|
||||||||||||||||||||||||||
  
|
Scheduling Titan CLI Using Windows Task SchedulerThe Windows operating system comes with many built in applications, some useful, some not as much. One little application that is often overlooked that can be extremely handy is the Windows Task Scheduler. Task Scheduler is a basic program; it runs a specific program at a predetermined time, either once or on a repeating schedule. Harnessing Task Scheduler is an easy way to add a level of automation to collections, potentially saving time and money. There are many times when it would be convenient to run a collection after business hours; perhaps because that may be when network usage is at its lowest, or because the target computers are not in use. Using Task Scheduler in combination with TitanCLI and batch files can be a great technique to utilize computers for data collection after business hours without requiring a user to stay all night. In order for Task Scheduler to be useful with TitanCLI, the user will first need to make a simple batch that directs TitanCLI to run one or more XML job files; a separate batch file creation guide is available for users who are new to TitanCLI and batch files. Microsoft has made a few significant changes to Task Scheduler over the years, and Windows XP and Windows Vista ship with versions 1.0 and 2.0, respectively. Users are able to schedule TitanCLI runs using both versions, but version 2.0 has functionality and gives the user more options. 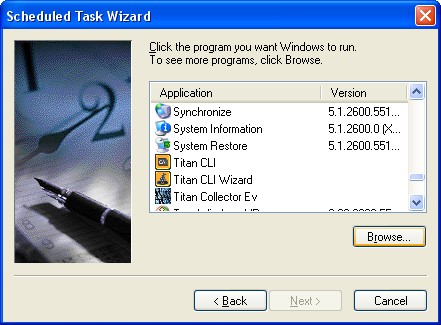 To access Task Scheduler in Windows XP, go to Control Panel -> Scheduled Tasks -> Add Scheduled Task, and from the Scheduled Task Wizard browse to batch file that was created earlier. It is necessary to have the Task Scheduler run a batch file that calls TitanCLI and not just call TitanCLI directly, because the batch file also specifies which XML Job file(s) to run. In the next screen choose to run the task one time only, and then specify the time and date the task should run. Enter the user credentials and click Finish; the task should appear in the Scheduled Tasks folder. Double-clicking on the task will open its Advanced Properties, which allows the user to change anything about it, including the time it runs, power management settings such as waking the computer to run the task if it had gone to sleep, and the setting to delete the task after it is run. 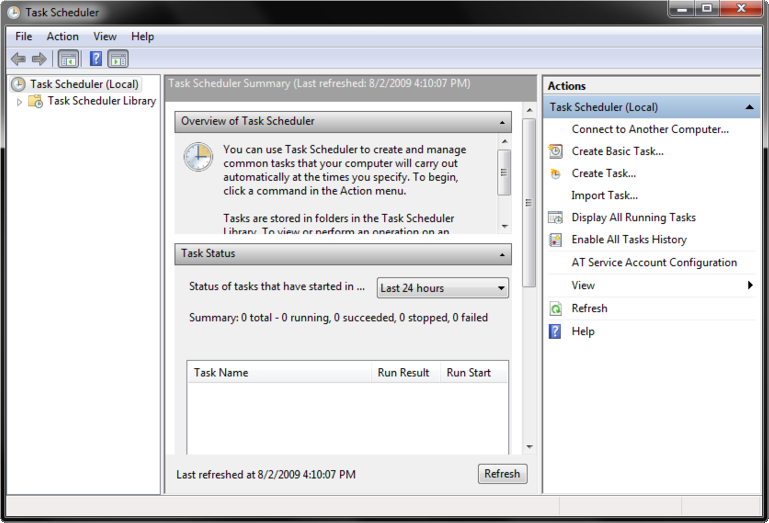 This process is similar using Windows Vista; go to Start -> All Programs -> Accessories -> System Tools -> Task Scheduler. Once the Task Scheduler has opened, go to Action -> Create Basic Task, and enter a name for the task. After clicking Next, choose to have the task run one time, then specify the date and time to run. On the next screen, select Start a Program, and enter the path to the batch file. The last screen will show a summary of the settings for the task, and if they are correct, click Finish. Version 2.0 adds the ability to respond to event-based triggers in addition to time-based ones, and also can perform more advanced tasks, such as sending an email when a task completes. |
|||||||||||||||||||||||||